Wednesday, March 28, 2012

Vive la France!

Or rather, vive la French Dip!

Red Beard has a soft spot for french dip sandwiches.  Beef, lamb, pork ... onions or no onions ... cheese or no cheese .... fancy or trashy.  He loves them.  And since they are a fairly easy dinner option (with a few side dishes), I've decided I love them too!


Best part:  the entire prep (when I'm not taking pictures at least) takes less than an hour with a minimal amount of dishes to do.  And it involves melty cheese.

I really love anything that involves melty cheese.  I also adore any occasion where I can disguise leftovers.  In this case, I was using up roast beef from a couple nights prior.  Nice roast beef, with lots of garlic.  Sure, I could have sent it with Red Beard to work in a cold sandwich, but this is so much tastier.

You'll need a few things to pull this off, but a lot of it is stuff you probably already have on-hand.  Aside from the beef and rolls, I can pretty much guarantee that I have some sort of cheese, and more condiments than my fridge door can comfortably hold (like mayo and dijon and worcestershire and sriracha ... and butter).  Onions and peppers and garlic are staples in my kitchen.  And you know, you just KNOW I've got wine. 

  • 8 ounces roast beef (either leftover roast, sliced super thin, like me OR sliced from the deli counter)
  • 1 whole bell pepper (any color);  3/4 nicely julienned and the rest rough chopped
  • 1 whole red onioin; 3/4 nicely julienned and the rest chunked up
  • 1 clove of garlic, well squished
  • 2 sandwich rolls (any type you like, but french or dutch crust are the nicest)
  • 8 ounces of cheese, sliced thin (any type you like, but I've found colby, swiss, provolone, and havarti work the best)
  • 1 tablespoon creamy horseradish
  • 1 tablespoon dijon mustard
  • 1 tablespoon mayonnaise
  • Kosher salt
  • Pepper
  • 1 tablespoon of butter plus butter for the bread
  • 1 tablespoon plus 1 teaspoon of olive oil
  • Fresh OR dried rosemary
  • 1 cup red wine
  • 1 small can low sodium beef broth
  • Worcestershire sauce
  • Sriracha sauce OR Tobasco

Mix together the mayo, dijon mustard, and horseradish and set aside.  This is your sandwich spread. 

First things first; let's talk au jus.  That wonderful, yummy, sploshy broth to dip the sandwich in.  Yes, of course, you could buy the Knorr packet and just mix with water.  But really?  All those preservatives?  I tried it once, thought it tasted like the little cubes of bouillon powder (so, ick), and made up my own version.  Surprise!  I'm making things up again!
In a small saucepan, over medium heat, add the teaspoon of olive oil.  When the oil is hot, add the rough-chopped onion and pepper bits, the squished garlic, and either 1 sprig of fresh rosemary OR 1/2 teaspoon of dried rosemary.  I was out of fresh.  I was also being cranky and refused to drive the 3.768 minutes to the grocery store.  Dried worked fine.    


Then toss in some red wine (about a cup) and a small can of low sodium (always always low sodium!!) beef broth.  Season to taste with salt and pepper.  Add a couple splashes of Worcestershire sauce and as much sriracha as you can handle.  I think I added only a small squirt, less than 1/2 a teaspoon.  I wasn't going for mouth-burning-scary-hot, just nice and warm. 

With regards to the low-sodium broth.  I like to add salt to foods; I like to be in control of the salt in my foods.  It's the same reason I prefer unsalted butter.  I have control issues.  Non-fat broth isn't something I look for.  If I happen to find a broth (chicken or beef) that is both low sodium and low fat - yay!  But taking the fat off of broth is easy - just set it in the fridge for awhile - that fat rises to the top and will solidify in the cold.  You can peel it off in a layer.  Easy peasy.  But there really isn't any way to pull the salt out.  


Sorry for the steam.  Hey, at least you know I'm actually cooking here!
Let it bubble while you prep everything else.  The longer it simmers, the yummier it will be. 

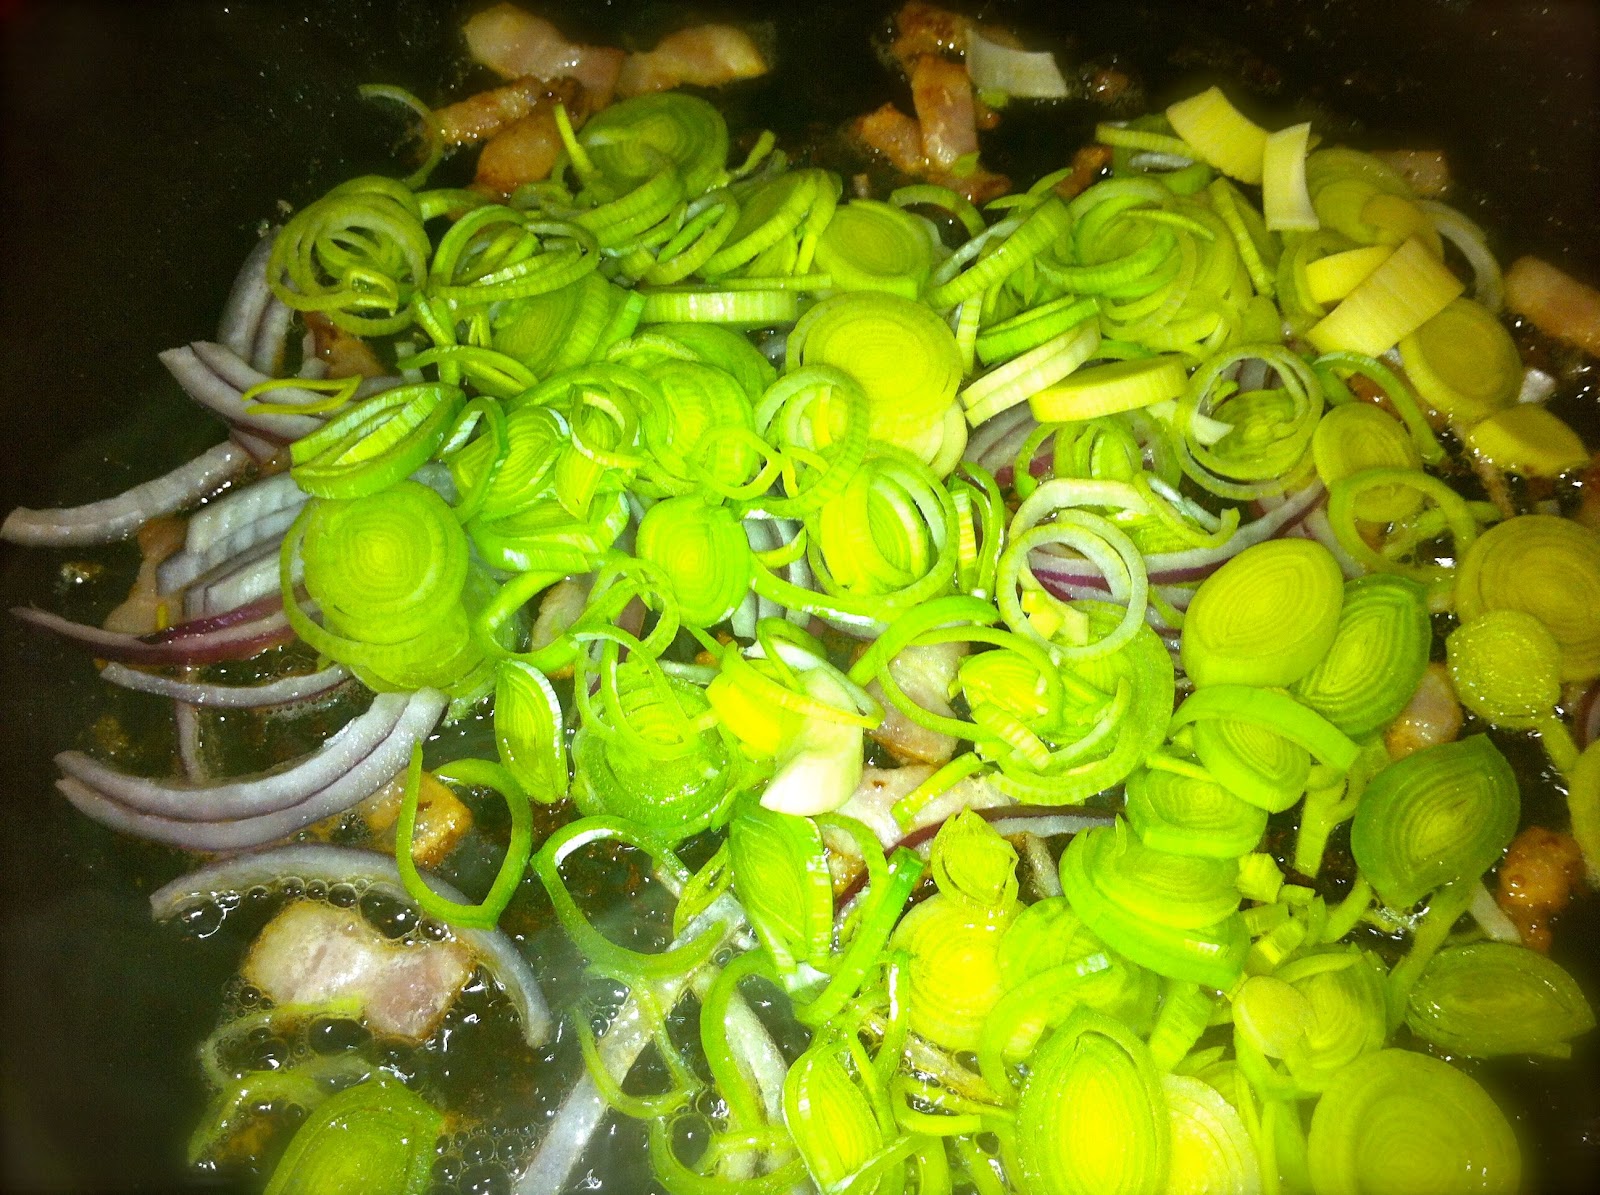
Now, in a skillet or frying pan, or another pot if you really want to be a rebel, heat the remaining olive oil and butter together over medium heat.  When the butter is melted, add your onions and peppers (the pretty julienned ones) and saute until the peppers are still a little crispy, but the onions are starting to caramelize.  Season with a little salt and a lot of pepper.   Bland is boring. 


Almost done!

While the onions and peppers are cooking, split your sandwich rolls, and butter them generously (because butter is awesome) and lay them out on a sheet pan.


Pop them under the broiler until they look like this:


Toasty bread is always nicer than regular bread.  ALWAYS.  Just keep an eye on them because I can't even tell you how many times I've burned bread under the broiler.  Nicely browned is only 5.68 seconds away from charcoal.  Slather the sandwich spread you made over everything.


Now, add your beef to your au jus.  It isn't going to be in there long, just long enough to get really hot and soak up a little of those yummy flavors. 


When everything is ready - the onions and peppers are dreamy, the beef is hot, and the bread is toasty - start assembling. Begin with toasty bread (all smeared with mustardy horseradish), and layer on your meat and peppers/onions.  Just make sure that whatever dish you're using is oven-safe.


Then add as much cheese as you can handle without your system going into shock.


Now comes the best part.  Before you add the top piece of bread, pop the sandwiches under the broiler one last time until the cheese is gooey.   Top the sandwiches off, add a cup of the au jus, and if you really want to make your family happy add a little of this:


We eat salad with everything.  It makes us less guilty about all of the cheese.
And a handful of these:

Sweet Potato Fries, available in the freezer section of Trader Joe's.  They are extra special when seasoned with a little cinnamon & chili powder.

Aside from being a gastrointestinal hootenanny, this meal is also not as guilt-laden as you may think at first glance.  Sure, there's cheese and butter and bread.  But if you can manage to limit yourself to 1/2 a sandwich (which I did do, and it was quite difficult), and eat plenty of salad, it's really not all bad.  There's a ton of veggies.  And the fries aren't fried and aren't regular potatoes.  Sweet potatoes are always being touted as a healthy alternative.  So I say eat the fries, enjoy the cheese, and fill up on salad.  And try to avoid the Haagen-Daz in the freezer, or all of those sweet potato brownie points will fly right out of the window.


Recipe now available @ Tasty Kitchen ... Click me!!

Wednesday, March 21, 2012

Falling Off of the Wagon

Did you hear the thud?  I think my butt's bruised.

Last night, I was not low-carb.  Sometimes I slip.  So sue me.

Saturday, I watched The Pioneer Woman (which I DVR, because it's on really early).  I like her; the blog, the cookbook(s), and now the show.  Granted I argue with her sometimes but I argue at times with ALL celebrity chefs except maybe Alton Brown and Bobby Flay and Jamie Oliver (them I tend to agree with a lot).  She made a seafood pasta dish and creme brulee and spinachy bacon salad - all things I'm fond of.  I was fine at this point.  Then, on Monday or Tuesday, I stumbled across her recipe for Pasta with Pancetta and Leeks.  Which of course caused me to promptly have cravings for BJ's chardonnay shrimp pasta.  Why wouldn't it?

Every so often, when I least expect it, I start dreaming about the super thin-crust appetizer pizzas (sausage or margherita) or the really tasty pasta that BJ's did, that mean mommy and I would order to split whenever we went.  Of course, I have no idea if BJ's still even offers it, but that doesn't stop the cravings.

The chardonnay shrimp pasta was very simple.  It had sauteed medium-sized shrimp, diced tomatoes (added at the very end so they weren't cooked to death), bits of apple-y bacon, and a lovely white wine butter sauce.   I don't remember if they used farfalle or rotini, but I do know it came with just enough parmesan on top and some really nice garlic toast.   

I just happened to have a bag of shrimp hanging out in my freezer, not to mention plenty of tomatoes and wine (ahem) and parmesan, at least three pounds of bacon in three different flavors, and approximately 456 different types of pasta all available in my kitchen, no grocery store stop necessary.  I could do this.

But then, visions of leeks started dancing in my head.  I had leeks too.  I had four very pretty leeks, already cleaned and begging to be added to something.

Then the lemons starting whining that they felt left out.  

And I stumbled across some basil from last week that was miraculously not grey and moldy.

THEN Red Beard (who knows the way to this girl's heart) was nice enough to run to the store for orange juice because we were out and it was cocktail time.  He also brought home baby scallops.

Hmmmm.  I could work with this.

Sure, I haven't ever made anything before with seafood and leeks and bacon all in one pasta dish.  So what?  In the name of science and research and evolution, I was going to give it a go.  Thankfully, for once the experiment was a smashing success and we ended up with this:


Fork.  Please.  Now.

Not all of my experiments are successful.  Believe me, some of my experiments are such phenomenal failures that I don't even bother trying to figure out what went wrong - it's more about forgetting it ever happened and moving on.  Lemon ricotta fettuccine?  What's that?  Never heard of it!

The ingredient list is ridiculously simple, despite being a combination of three different recipes.  Just one thing to keep in mind - do your prep before you start cooking!!  It's called mise en place, translating to "putting in place".  Yes, I'm using fancy French terms again.  When it's time for the wine to reduce, you'll have some time to chill, but really, just have everything ready.

I didn't.  I'm fast, and even I couldn't quite keep up with this one.  I had to call in Red Beard for assistance.  How thankful was I that he's well-versed in things like zesting and grating?

Have. Everything. Laid. Out.  

You'll thank me later.  This pasta is worth the effort.

  • 1/4 red onion, julienned
  • 2 leeks, cleaned, dark green tops lopped off, thin sliced
  • 3 large cloves of garlic, super thinly sliced
  • 2 slices of thick cut bacon, (medium) diced
  • 3 medium sized tomatoes (or 5 roma 'maters), seeded and diced
  • 1 lemon, zested and 1/2 of it juiced 
  • 2 cups of white wine
  • 2 cups of heavy cream (oh come on, just this once... admit it - I don't make you pull out the cream too often)
  • Salt (Kosher or Sea Salt, as always, nothing iodized)
  • Lottsa pepper
  • 1 pound of thin spaghetti (or a pound of whatever pasta or noodles you feel like)
  • Butter (about 2 tablespoons)
  • Olive oil (just enough to keep the butter from burning)
  • 1/2 cup of Italian Parsley, well chopped
  • 1/2 cup of Basil, well chopped
  • About a cup of finely grated parmesan cheese (preferably grated yourself, using a micro-plane, which produces the most fluffy clouds of cheese you've ever seen)

And of course, the pièce(s) de résistance ...

1/2 pound of medium shrimp, peeled & de-veined.

 And the Roomie's contribution ...

1/4 pound of baby wild scallops.  I don't know why this picture turned out way yellow.

Start by cooking your seafood.  Add about 1 tablespoon of butter and 1 tablespoon of olive oil to your largest skillet.  I was using my not-new-but-hardly-used shiny red Le Creuset cast iron skillet (it was in storage when I was between kitchens; and for awhile I was scared of cast iron).  I am in love with my skillet and it hasn't been put away for a week - it gets cleaned, re-seasoned, and set back on the stove.  

Make sure your pan is nice and hot - the seafood isn't very big and you want to get some color without overcooking them.


First the shrimp.
Then the scallops.

When the shrimp and scallops are done, set them aside.  Add the bacon to your pan.


All those brown bits = massive flavor.


When your bacon is fairly dark and starting to get crispy, start adding your veg.


First your onions.  Let them start to caramelize.

Then your leeks.  Let them get all wilted and soft and happy while they swim in bacon grease.
Then your garlic.

In the meantime, preheat your oven to 400ºF and have your pasta water boiling on another burner.  

Side Note on Pasta:
When it comes to cooking pasta, I DO salt my water but I DO NOT add any oil.  You want your sauce to coat the pasta, and adhere to all the starch (you know, the stuff that makes pasta sticky).  Oil will form a barrier.  Why would you want a barrier between your noodle and your yummy sauce? 

Now at times you'll see recipes where olive oil is used after the noodles are drained - that's different; that's when the oil IS the sauce.  


Cook to al dente.  It won't get more than a re-heat in the pasta sauce.

I was taught that the water for boiling any type of pasta should be as salty as sea water, so chuck in a lot.  I usually just pour it in straight from the box.  In the event your noodles get done before your sauce is ready, just drain them and set aside.  They can take it.

Season your oniony bacon and leeks with a whole lotta pepper, and not too much salt.  Bacon is salty, and we'll be adding parmesan later (also salty).  PLUS you salted your pasta water.  So for now, salt sparingly. 

Now add the wine (no picture, sorry, I was too busy inhaling deeply and wishing I had a magic wand to speed things along).  Stir and scrape to get the brown bits up.  Then, be patient.  Let it reduce by about half.  It'll get dark and speckled and look funny.  That's okay, it'll taste (and smell) really really good.


Now add about 1.5 cups of your cream.  Stir.  Breathe.  Sigh in delight.

Let the cream reduce a little - just a few minutes at a simmer.  Just until it starts to thicken up a little.  Now add that last tablespoon of butter.  Stir, let the butter melt, and turn off the heat.    Now we're going to start chucking in everything that's left.  If your skillet isn't big enough OR if your skillet isn't oven-proof, now is the time to transfer everything to an oven-proof dish big enough to handle it.  Just use a little pan spray please.


The pasta noodles. 

The tomatoes. 

About 2/3 of the parmesan cheese.  It's so fluffy!!

The herbs, the seafood, the lemon zest.  I need to find the macro setting on my camera.

Mix everything really well.  Taste to adjust your seasonings.  Avoid eating many many bites.  If it "feels" too dry, add that last 1/2 cup of cream.  As the cheese melts, the pasta could get a little dry and sticky.  Drizzle the lemon juice over the top of the entire thing. Sprinkle the rest of the cheese over the top.  Now pop the entire skillet, uncovered, into your nice hot oven.  It doesn't need to stay in very long if you're using the skillet, because it really hasn't had a chance to cool down much.  Really, this is just to make sure that everything is piping hot and the cheese is gooey. I think I left it in about 10 minutes. 


Oooooh melty.  Seafoody.  Lemony.  Basily.  Leeky.  Alllll goooood.

Yes, it's got a few more calories than any of us should eat on a regular basis.  But as a kick-off to the beginning of spring, and a once-in-awhile treat, it's okay.  Really, I'm giving you permission.  Enjoy it, savor it, love every bite; tomorrow, you can have a salad and move on.  No guilt please!  This pasta deserves to be enjoyed with no guilt.


Seriously.  FORK.


This should have fed four people.  Especially with a nice fresh salad and maybe a little garlic bread (because if you're going to fall off of the wagon, you may as well be trampled by the horses as well).  And a grilled vegetable or two (asparagus and mushies perhaps?).  

It didn't feed four.

Red Beard and I killed 90% of it.  Just the two of us.  In one sitting.  Granted, he eats about 4 times as much as I do, so it wasn't like I horked down almost half the pan all by myself.  But let's face it, there was definitely some over-eating taking place by both of us.   And it smelled so good that we didn't take the time to make any side dishes.  We just sort of dove in.  It was amazing we managed to get it on plates.    The difference is, his metabolism runs at warp speed all the time and he can handle it.  Men and women are so not equal.

Admitting I was a piglet is painful and no fun.  

But you know what? It was completely and utterly and wonderfully worth it.  Yup, it was THAT GOOD.

Recipe now available @ Tasty Kitchen, yay!  {click here and fire up your skillets!)


Monday, March 19, 2012

Where's the Beef?

It's drunk!  Who isn't drunk on St. Patrick's Day?

The perfect sequel to a shot of Jameson.

By now, you're all well aware of my aversion of corned beef or any type of pickling when it comes to beef.  I love beef.  Pickling seems like a ginormous waste.  

That being said, Red Beard love love LOVES corned beef and when asked, how could I say "no"?   Red Beard wants corned beef, he's going to get corned beef.  It's a similar circumstance on his birthday when he wanted banana cream pie.  He wants the devil fruit in a pie?  I'm going to make on for him.  In both scenarios, don't expect ME to eat it.

This is probably one of the easiest recipes ever.  No technique or cooking skills required.  For those of you who share my views on pickled beef, this comes out a lot mellower than most corned beef does.  

Ingredients include:
  • 2 stalks of celery
  • 2 carrots (you don't even need to peel them!)
  • 1/2 of an onion
  • 6 cloves of garlic
  • 3 sprigs of fresh rosemary
  • 1 sprig of fresh thyme
  • Herbes de Provence (I warned you, this stuff is magical!)
  • Salt (Kosher or Sea)
  • Black Pepper
  • 2 bottle of Guiness (actually, buy a 6-pack, then you'll have plenty for drinking)
And of course, one of these:

Pre-Brined.  If you want to do your own, check out Alton Brown over @ Food Network.

I found a corned beef brisket that was just over 3 pounds and it easily fed 6 people.  You know, as a benchmark.  Six people not including me or Mean Mommy (because she hates it too).

Wash and roughly chop the celery, carrots and onion. Arrange them in the bottom of a large baking dish (one that is big enough for the brisket too).  You may want to spray your pan first with your handy-dandy pan spray (we love Pam!).  On top of the vegetables, place the corned beef brisket fat-side-up. Using a sharp knife, cut a cross-hatch pattern into the top of the fat layer. 


No knife skills required.

Chop the garlic and rub it into the top of the meat (try to get some into the cuts on the fat). Tear up the herbs (rosemary and thyme), and sprinkle some on top of the meat and just chuck the rest into the pan.   If the corned beef you bought comes with a spice packet, spread that around too.  Season the beef well with herbes de Provence, salt and pepper and crack open a Guinness for yourself to pour in with the beef.
 
Bake, covered, at 350ºF, for 3 hours. Add the second bottle of Guinness and continue to cook for another 3 hours.

Voila!  All done!  

Happy St. Paddy's Day!


This corned beef comes out fork-tender and very flavorful.   If you're doing mashers and gravy, strain the bits out of the liquid and heat in a pot with about 1 cup of beef stock and a splash of red wine - taste to adjust the seasonings - and thicken with a corn starch/cold water slurry.  That's it!  See, super easy!
 

Two things to keep in mind:
*** The vegetables are used for flavoring, NOT to serve with the meat—they are too mushy and soak up the more bitter flavors from the beer.  Pitch them.  Trust the French on this (because they do know how to cook), mirepoix has a very specific purpose and sometimes doesn't make it into the final dish.

***The corned beef can be made up to 2 days in advance, if wrapped well and stored in the fridge. Not only does this save you time later (especially if you’re trying to have corned beef for dinner after working all day), but it also gives you a chance to chill the liquid down and pull the fat off (the fat floats to the top and solidifies). The beef was super easy to thinly slice when it was cold; once sliced, place in an oven-safe serving dish with a ladle of the liquid, cover, and bake until hot (approximately 30 minutes) at 300ºF.

Recipe is ready to print over at Tasty Kitchen!


Our Stinky Friend, the Turnip

Also titled "Chapter 2 of Irish Food, updated to be edible" ....

I believe I may have mentioned this before, but I'm going to have to say it again.  Very rarely do I actually eat any of the veggies cooked alongside a roast (or in this case, corned beef).  I tend to cook my meats with some mirepoix for flavor, and then chuck it later because the veg have cooked to death and are a mushy pile of inedible crap.  It may seem wasteful, but the gravy is a-mazing and I don't really mind sacrificing 1/2 an onion, a carrot, a celery stalk, and a couple of garlic gloves to the kitchen gods all in the name of yummy food.    The only time I've been happy with the results is when I've cooked the meat most of the way first, drained all the liquid off, THEN added my veggies to a mostly dry pan to roast a bit while the meat finished cooking.  I usually end up burning myself and splashing hot fatty meat juices all over the place.

I don't like burning myself.

I also don't enjoy cleaning up greasy bits in my kitchen.

It's just so much easier to get a sheet pan dirty and cook it separately.  I don't end up with a blister on my thumb the size of my face, my kitchen says (relatively) clean, and I'm not quaking in fear for the safety of any dogs, cats, or toddlers that may be wandering around. 


Oooooh.  Turnips. (Not eeeuuuuuuw, turnips!)
 
Okay, that being said, it's on to the root vegetables we're going to be working with, several of which are going to cause a few scrunchy faces.  Yes, turnips are stinky.  They can't help it, God made them that way.  Rutabagas, being a cross between a turnip and cabbage, can be a little stinky also.  But this is kind of like how cheese is super stinky, but the most awesome food ever created by man. Turnips and rutabagas, especially when combined with garlic and carrots and onions and parsnips, are wonderful and delicious and beautiful and yummy.  And, even better, easy peasy to prep!

Easy enough that I was able to make dinner in spite of my two helpers.  Or course the Wonder Kitten is my little shadow and thinks it his God appointed duty to perform supervision on everything I do, from laundry to cooking to getting ready for work every morning.


Notice the well-chewed hair tie that he's hanging out with.  He's a little odd.  But at least he's pretty!

My second pain in the ass helper was the Most Spoiled Puppy Ever Created (because wherever my parents go, Buster Pup goes too).  His idea of being helpful was heckled by Wonder Kitten and jumping on the couch and drooling water all over my floors.  It took four tries to get a picture with even half of his face in it; he kept thinking I had a treat (or maybe the camera was a cookie) and sitting up.  


Notice his well-stocked toy basket.  He also has his own cookie jar filled with biscuits.  He felt a little displaced when we finally got a dog of our own.

All of the ingredients are easily found pretty much anywhere.  I went shopping at Albertson's Savemart and had no trouble, which means Winco or Raley's or any other store in the BLC would have what you need (because Savemart isn't known for their variety).


Way. Too. Much.

In terms of quantity, do not go by the picture.  Much of this is still wrapped up, raw, in my fridge to use later.  While it looked like a reasonable amount when I was washing and peeling, it grew as I was cutting.  I used a fraction of the pictured produce and had plenty for 6 people as a side-dish, plus leftovers.  

As ever, preheat your oven, this time to 400ºF.

You'll need:
  • 1 large parsnip, or 2 if they are small.  Mine weren't small.  They look like big white carrots, but taste a little like fennel.
  • 4 carrots.  No explanation necessary, you all know what a carrot is because you weren't raised by wolves.
  • 1/2 large rutabaga.  I bought a gigantic one.  If you find small ones, your probably bought a turnip accidentally.  Rutabagas look like giant turnips.
  • 1 large turnip or 2 small ones.  These look and small exactly like (smaller) rutabagas!
  • 1/2 red onion
  • 4 cloves of garlic
  • Italian Parsley
  • Olive Oil
  • Butter
  • Herbes de Provence (I did warn you that these would get used again and again)
  • Salt and Pepper (Kosher or sea salt please.  Iodized salt tastes like poo.  Kosher salt is super cheap and usually in a big box on the bottom shelf).
Wash and peel everything.  Rutabagas and turnips are hard and nasty to cut through, so watch your fingers - if there isn't a flat-side to rest it on, cut a piece out of one side.   Cut your root veg into cute little sticks - fatter on the carrots and parsnips (because they cook faster), skinnier on the others.


Chop the parsley and thinly slice the garlic and onions.   Then season well with salt and pepper (and more pepper) and about 1 tsp of the herbes de provence.  Toss well to mix and spread into a (mostly) single layer on your sheet pan.


It would also be a good idea to use a little pan spray.  No one likes to scrub.


Break up the butter into small pieces and dot it all over the top of your veg.    Roast them uncovered for about an hour.  After about 30 minutes, give them a good stir (just make sure they get back into a single-ish layer when you're done mixing).

The garlic roasts and gets all mellow and happy.  The onions start to caramelize.  The rutabagas turn this pale creamy apricot color.  The turnips, while still turnips, mellow a little and their flavor helps to balance out the sweetness from the carrots and parsnips.  Everything just gets really really nice.  


The pale yellow chunks? Rutabagas!  No way to mistake them for a turnip now!

If you need to hold them for a bit before serving, transfer to an oven-proof dish, add about another 1/2 tablespoon of butter, just because it tastes good, and cover them well.  Then set them in a 250ºF oven while you finish up the rest of dinner.

Of course,  I served these on Irish night, with corned beef and braised cabbage, but tonight we're having them with roast beef ... and next week we'll have them with roasted chicken.  And the week after that we'll have them with barbecued pork chops.   If you don't have a Roomie like I do, these could be served in place of potatoes, OR you could scrub a handful of red potatoes and cut them into wedges and just add them to the mix.  Very versatile little dish!  And it's already vegetarian; vegan if you omit the butter. 

Recipe available, all handy and ready-to-print, with measurements, over at Tasty Kitchen (click here!  click here!)

Friday, March 16, 2012

Greetings from the Cabbage Patch

As promised, this is chapter 1 of the Step-by-Step of Updated St. Paddy's Day Food.  

Growing up, we ate cabbage two ways:  boiled, where it stunk up the entire house, or fried - starting the pan with a pound of bacon (approximately) and chucking in some chopped green cabbage to fry off in the bacon fat.  While in theory this is fantastic (you all know my views on bacon fat), it actually came out a kind of greasy.  Also, the cabbage could be damn bitter. 

Handled properly, like so many other vegetables on the planet that I thought I hated until I learned how to cook them correctly, cabbage is not bitter.  It's actually well-adjusted, and happy, and despite it's bad reputation has no need for therapy. 


While I ran screaming from the cabbage stench as a child, as an adult I have a much broader appreciation for both cabbage and it's many relatives.  Red is great in salads or slaw, or braised with apples and dill ... napa cabbage is great in salads or soups or any Asian food you can think of ... bok choy is great in soups or roasted ... even kale can be wonderful in a white bean soup.  Greens are good, people!  No scurvied and toothless folks in my household!  Eat the rainbow!  And I don't mean Skittles.


You'll need onions and garlic, a little celery, an apple and a bell pepper, some Italian parsley, salt and pepper, and fennel seeds.  And of course, you'll need green cabbage (I had 1.5 heads, but again, it's not rocket science, so you don't HAVE to buy an extra 1/2 a head...) and napa cabbage and a bulb of fresh fennel (some stores label this as "anise").    For the braising liquid, we'll be using a mixture of white wine and chicken (or vegetable) stock. 

Now warm up your fingers and sharpen your knife.  Today, there is no food processor and no "rough chopping", it's time to practice your knife skills and make things pretty.  As you're slicing, shredding, and julienning, keep your items relatively separate - you'll be adding them to the pot at different times.


I used a mix of onions, mainly because I like the colors.  Slice the onions as thin as you can (if you're using whole onions, cut them in half first, then slice.  That nice flat side will insure that you don't lop off a finger accidentally).

The celery, apple, and bell pepper need to be julienned.  All that fancy French word means is that you want skinny pretty little sticks.   Since the onions form little cute sticks, and the cabbage slices (as they break apart) make long skinny strips, it all goes together.


The garlic needs to be finely sliced.  The fennel is a little weirder.  Start by cutting off the feathery dark green tops and discarding.  Wash well, if it's too dirty go ahead and take off the outer layer (it acts like a cross between an onion and cabbage, it's got all sorts of layers).  Then slice thin.  Some of the slices will break apart automatically - others won't.  The slices that stay whole need to be julienned like all the other stuff.

Both cabbages can be cut in half, cored, and sliced thin - they'll fall into shreds by nature.  Do not, DO NOT, use red cabbage for this.  Braised red cabbage is a whole other recipe, one involving vinegar so that the cabbage stays a pretty color.  If cooked without enough acid, red cabbage bleeds all over everything and turns a weird bluey-grey color.  Very ick.  

Chop your bacon into a medium dice.  Start in a dutch oven (or similar heavy-bottomed pot) over medium-ish heat to render out the fat.  When the bacon is giving you all sorts of nice brown bits, add the onions.


Give the onions enough time to start getting nice and caramelized before you add anything else.  This will help kill any bitterness later.  Caramelized onions are sweet and sassy.  Now add the peppers, celery, apple, and garlic.  If your pan seems too dry at any point, add about a tablespoon of butter.


Once the celery and peppers are getting soft, add the final tablespoon of butter and a tablespoon of olive oil.  As boiled cabbage is icky, we need to give all those green enough fat to get their saute on before we add any liquid.  When the butter is melted, add about a teaspoon of fennel seed, and allllll thaaat cabbage.  


Yes, it will seem like a lot. 

Yes, it may seem like too much for the pot.

Don't worry about it.  It wilts down fast.  If you're the nervous sort, add the cabbage in batches, giving each batch a few minutes to wilt before you add more.  Napa cabbage is a lot fluffier than the regular green stuff, it wilts down pretty fast.


Keep adding, it can take it.


Give the cabbage about 10 minutes to hang out, mixing it fairly often.  Then, deglaze your pan w/ the white wine, add the stock, cover your pot and walk away.  Spend 20 minutes sipping a cocktail and figure out how to con your significant other into doing the dishes.

Now, if you are going to be pressed for time, this is a fantastical dish to make the day ahead, which also makes it a wonderous potluck option.  In fact, I think it even nicer after it's had time to sit overnight.  Just wrap it up really well or stash it (with any liquid!  do not drain!) in a covered casserole dish and keep it in the fridge.  When you're ready to serve it, pop it into a pre-heated 350ºF oven for about half an hour, or until is super duper scary hot.  


Shhhhh, don't tell anyone, but I'll even eat this cold.


Really, this is awesome.  People who don't like cabbage will actually like this.  It's got around 98713 mg of Vitamin C per serving and at least 1893 serving of veggies.   And the bacon!  It's not crispy anymore, after spending all that time in the liquid, but it isn't weird and squishy either - it just adds this great texture and of course all that flavor.  

Chapters 2 and 3, all about roasted veg and corned beef, on their way!

Variation:

This can be taken down a notch to vegetarian levels, or all the way to vegan.  For vegetarian, just take out the bacon.  Start your pan with 1 tablespoon of olive oil and 1 tablespoon of butter, and make sure you use vegetable stock.  Easy peasy!!  If you want a vegan dish, omit the butter as well and use only olive oil.